

Ignition Page
The Ignition page configures the power-sequence timers on platforms that have an ignition MCU: the CQ20 and the CQ40N series. On hardware without ignition timers, such as the CQ40 series, the page is greyed out. This page covers the app itself; for what the timers do, their safe ranges, and the power sequence in full, see Ignition Timers.
The page reads its whole layout from the connected hardware, so what you see depends on the machine. A CQ20 shows four timers in two groups; a CQ40N shows five timers in three groups plus a Delay Unit card. Nothing needs configuring to switch between them.
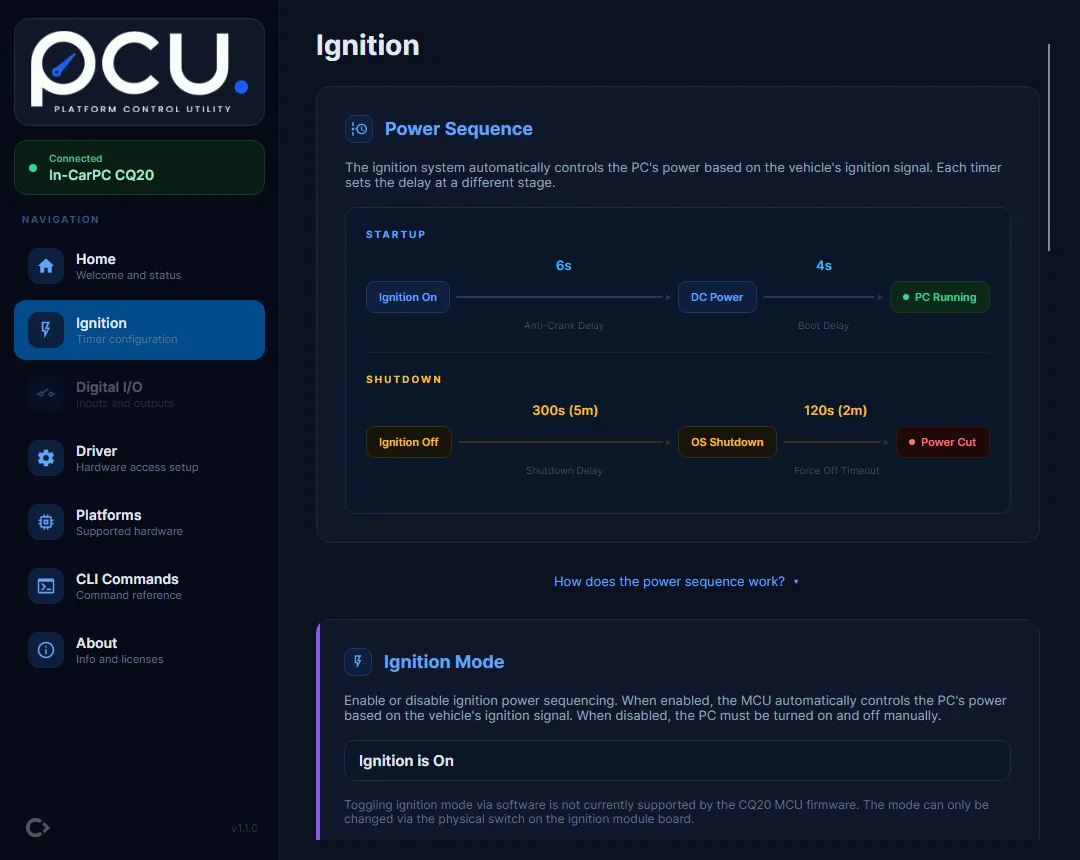
The power sequence
Section titled “The power sequence”The “Power Sequence” card at the top draws a timeline of the startup and shutdown paths, with each timer’s current value shown on the stage it controls. The stages come from the connected platform, so a CQ20 shows Ignition On to DC Power to PC Running, while a CQ40N shows a shorter Ignition On to System Start. Select “How does the power sequence work?” underneath for an explanation written for that platform.
The full description lives on Ignition Timers.
Changing a timer
Section titled “Changing a timer”The timers are grouped into cards by what they control:
| Card | Contains |
|---|---|
| Startup Sequence | The timers between turning the key and the PC booting |
| Shutdown Sequence | The timers between turning the key off and the PC powering down |
| UPS and Power Loss | The timers that apply when running on the UPS battery (CQ40N only) |
Every timer shows its description, its Recommended / Default / Range, and what happens if you set it too low or too high.
To change a timer (for example the Shutdown Delay on a CQ20):
- Open the “Shutdown Sequence” card and find “Shutdown Delay”.
- Choose a value: either a “Quick select” preset (for example “5 min (default)”) or type a number into the custom value box.
- Select “Save”.
- In the confirmation dialog, check the value and select “Confirm”. The dialog is titled “Confirm Timer Write” and reads, for example, “Write Shutdown Delay = 120s (2m)?”.
- pcu writes the value, reads it back, and shows “Set to 120s” once the hardware confirms it. The current value updates to the verified reading.
Presets and typed values are checked against the timer’s range before the write, so an out-of-range value is rejected before anything is sent to the hardware. The presets offered are the ones that suit the connected platform, so the same timer name can offer different presets on a CQ20 and a CQ40N.
Delay Unit (CQ40N series)
Section titled “Delay Unit (CQ40N series)”On a CQ40N the page shows a “Delay Unit” card above the timers. Most of that platform’s timers are counted in this unit; the Ignition On Delay is always in seconds.
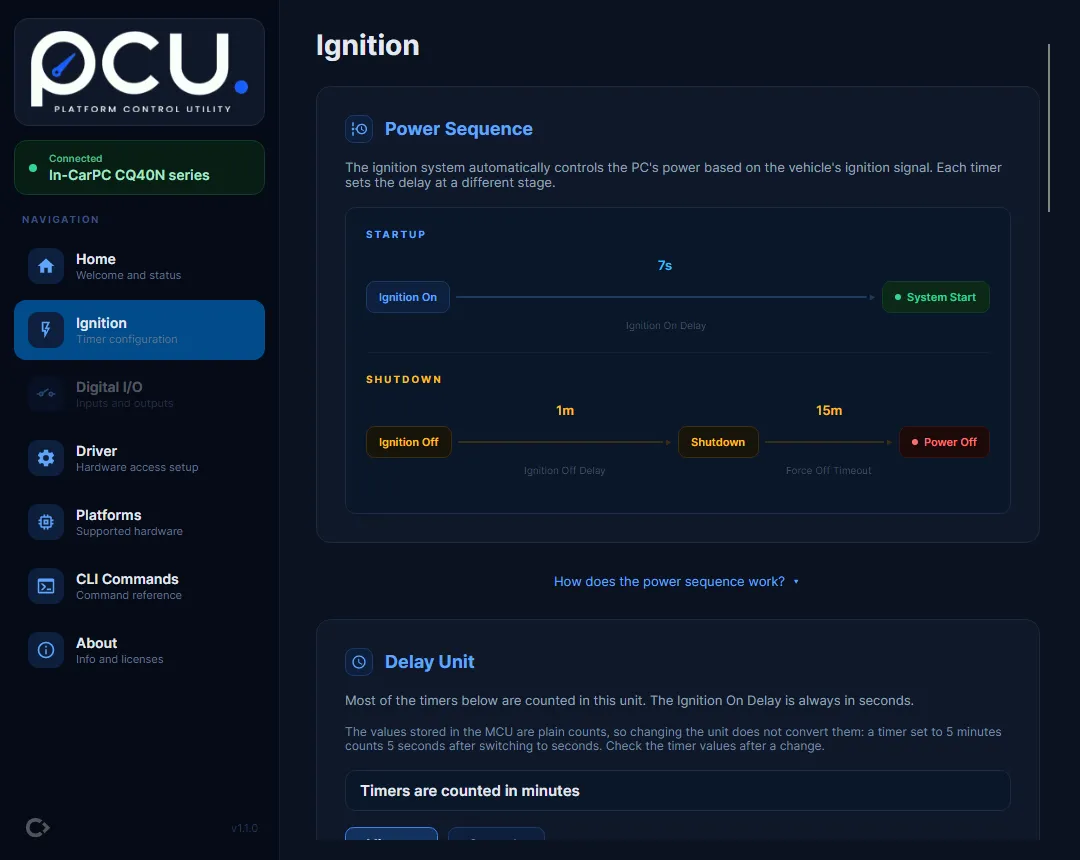
The card shows the current setting as “Timers are counted in minutes” or “Timers are counted in seconds”, with “Minutes” and “Seconds” buttons to change it. It reads the setting from the hardware each time the page loads, so it stays correct even if the unit was changed outside pcu, in BIOS setup or with the manufacturer’s own utility.
Unit changes and timer writes cannot overlap. While the unit is being written the timer cards are disabled, and while any timer is saving the unit buttons are disabled, so the two can never race on the same MCU.
Ignition mode (CQ20)
Section titled “Ignition mode (CQ20)”On a CQ20, an “Ignition Mode” card between the power sequence and the timer editors shows whether ignition power sequencing is currently on (“Ignition is On”) or off (“Ignition is Off”). It is read-only.
Cards you do not see
Section titled “Cards you do not see”The Ignition Mode and Delay Unit cards appear only on hardware that has the underlying setting. A CQ20 has an ignition mode and no delay unit; a CQ40N has a delay unit and no ignition mode. The card that does not apply is hidden rather than greyed out.
This is deliberate, and it differs from how the rest of the app behaves. Elsewhere pcu greys out an option and explains why, because the action is temporarily unavailable. A missing hardware setting is not a temporarily unavailable action, and showing a greyed-out control would imply the machine has a setting it does not have.